Pinch pleat curtains install guides
Use our step-by-step guides to install your new curtains like a pro.
Pinch pleat curtain installation
Getting started
Be careful not to damage the curtain when opening the packaging. Unpack the curtain and check the following parts are included:
- Curtain/s with hooks attached
Tools required:
- Pencil
Illustrated steps
Step 1
Rods and tracks spline setting
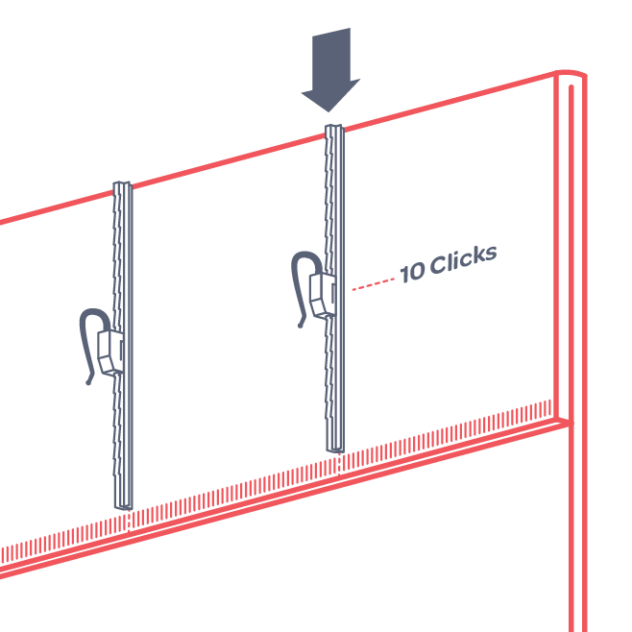
These curtains come with adjustable hooks on splines so you can raise and lower the hanging position of your curtain. Start by turning the curtain over so the back is facing you.
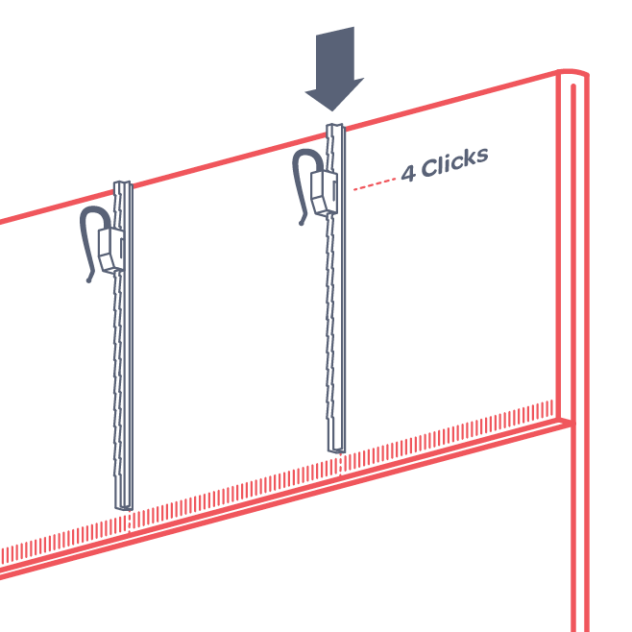
For curtains on tracks, set the hooks 45mm or 10 clicks down; and for curtains on rods, set the hooks 15mm or four clicks down.
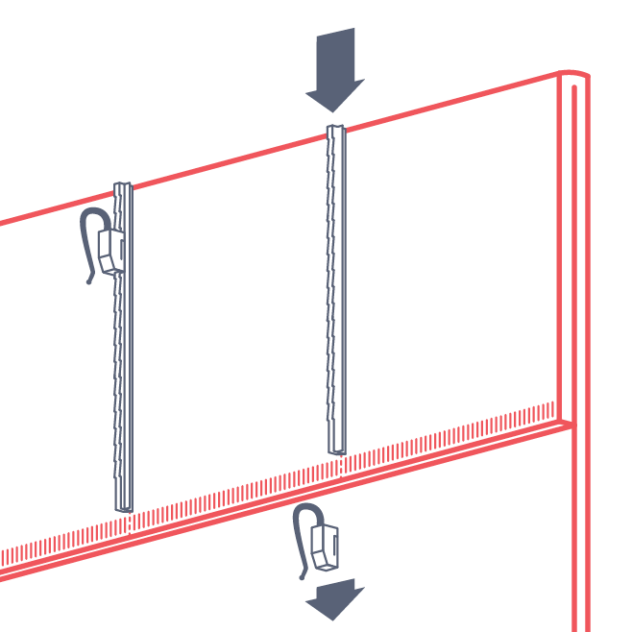
If you click too far, simply push the hook all the way down and off the spline so you can re-thread it back on from the top.
Step 2
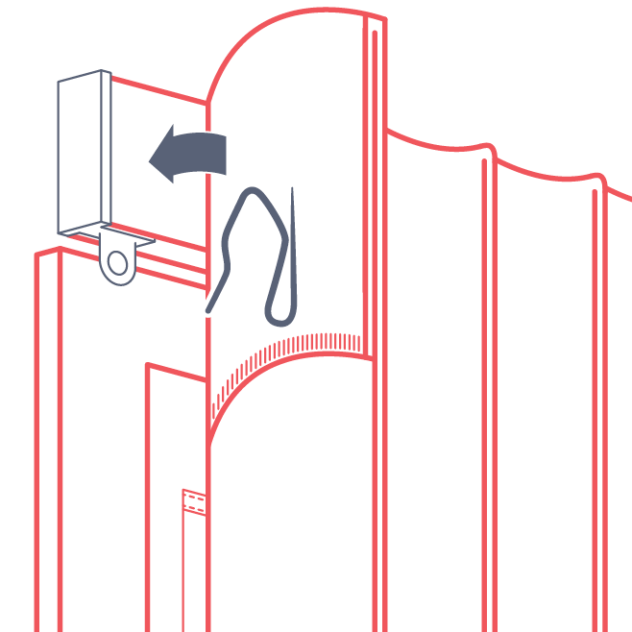
The first hook and last hook are metal hooks and must be inserted into the edge of the curtain. Insert the pin hook at the same heading as the plastic hooks to make sure the heading of the curtain is straight. Lift the curtain off the ground and begin hanging by attaching the first hook into the end of the curtain track. This is the loop that doesn’t move and holds your curtains in place
Tip: We recommend resting the curtain over your shoulder as you do this so it doesn’t pull heavily on the track before it is fully installed. You may need someone to help you.
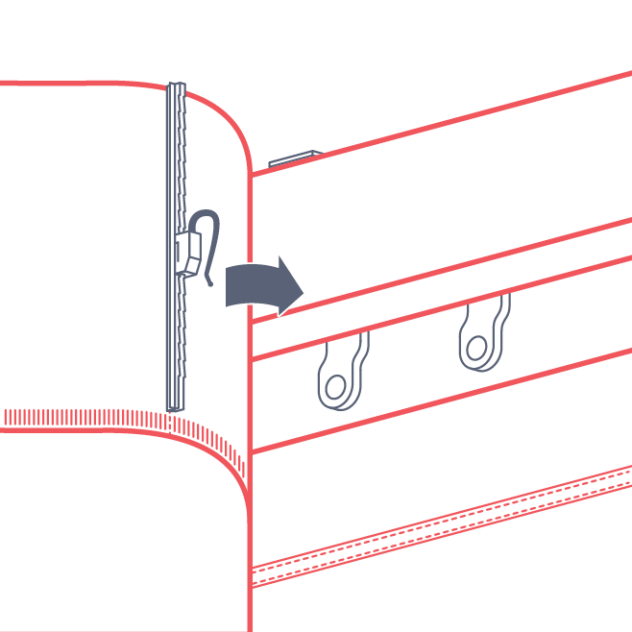
Step 3
Continue hooking the curtain into the glide holes until your curtain is hanging off the track or rod.
For a pair of curtains, repeat steps 1 and 2 from the other side of the track.
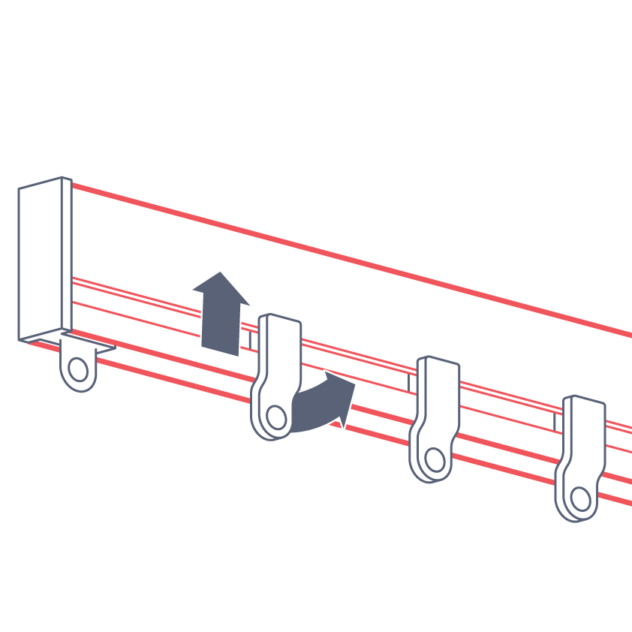
Step 4
To remove any excess glides, grip the bottom of the glide and push it up while also pushing backwards. Reverse this step to add glides where you need them.
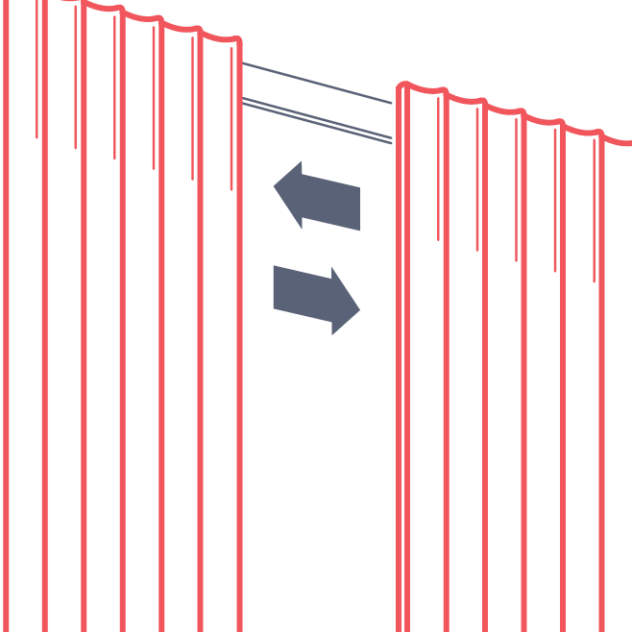
Step 5
Check the fit by pulling the curtains closed to ensure there is enough to overlap at the middle.
Tracks & rods installation
Getting started
Being careful not to damage the track or rod; remove the packaging and check that the following parts are included:
- Curtain track or rod
- Face fixing brackets + 2 screws per bracket (number of brackets depends on the length of the track or rod)
- Bracket covers (one per bracket)
- Finials or endcaps x 2 (supplied with rods only)
- Glides attached to track or rod
Tools required:
- Pencil
- Tape measure
- Phillips screwdriver (track only)
- Power drill with a 3mm drill bit
- #2 square drive
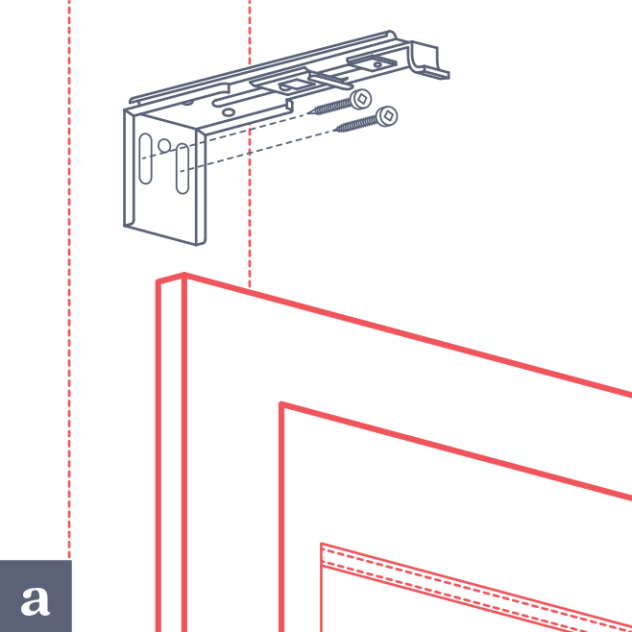
Step 1
Find the position you originally measured from when ordering your curtains. Remember the top of your curtains should sit 5mm higher than the top of your track, or if using a rod, they will sit flush with the underside of the rod.
Ideally, if available, fix your first and last brackets into wood behind the wall lining (plasterboard) within the first 250mm of the ends of the track (a).
Tip: Use a stud finder to find wood.
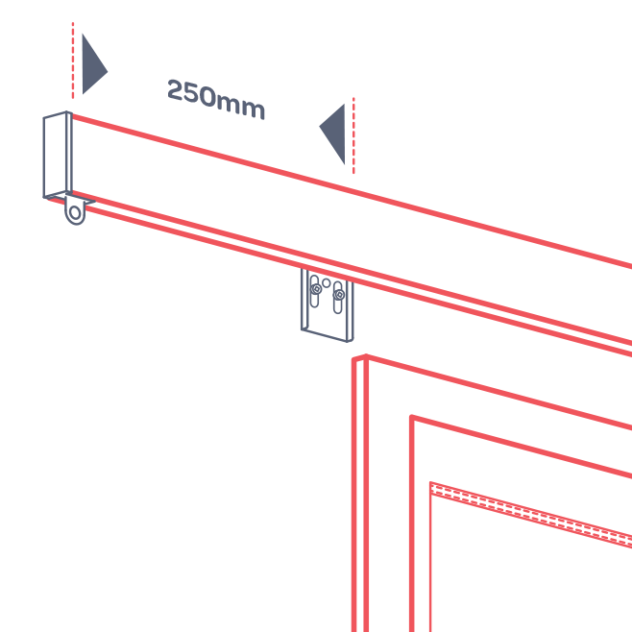
If there is no wood within the first 250mm of track, use wall plugs and place the first and last brackets within 100mm of the ends of the track or rod.
Space the remaining brackets evenly between the first two, no more than 700mm apart.
Fitting tracks
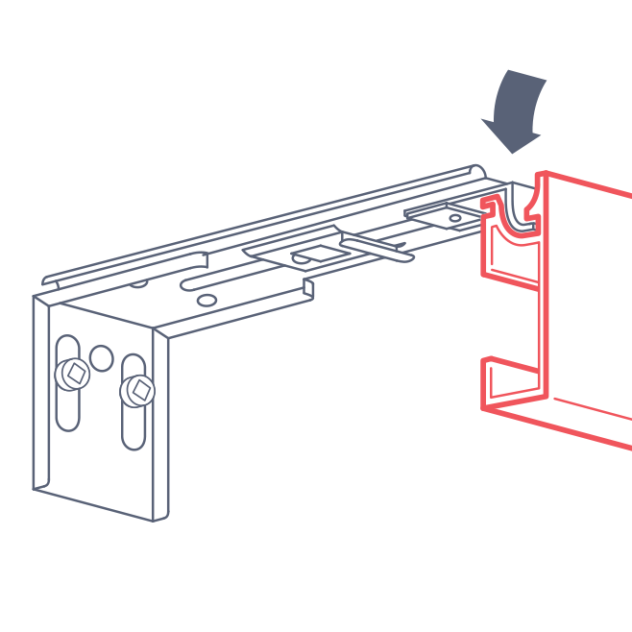
Step 2
If fitting a track, attach it to the brackets by ‘hooking’ it onto the front of each bracket.
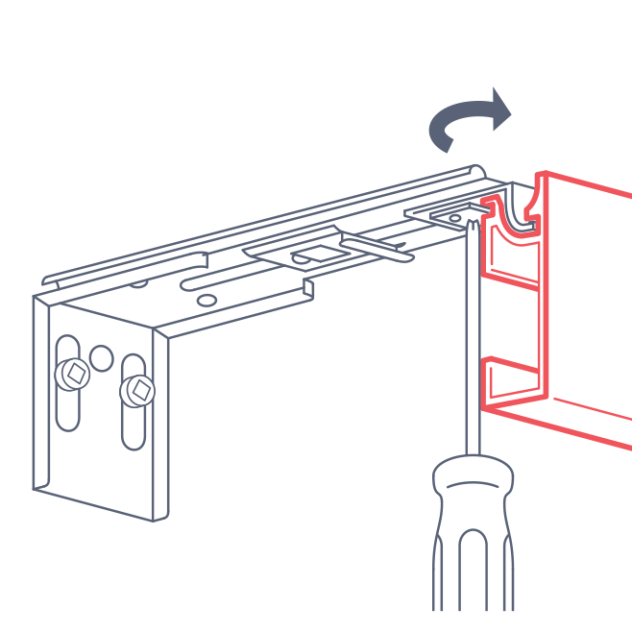
Step 3
Lock the track in place from underneath using a Phillips screwdriver to turn the camlock counter clockwise until it stops.
Fitting rods
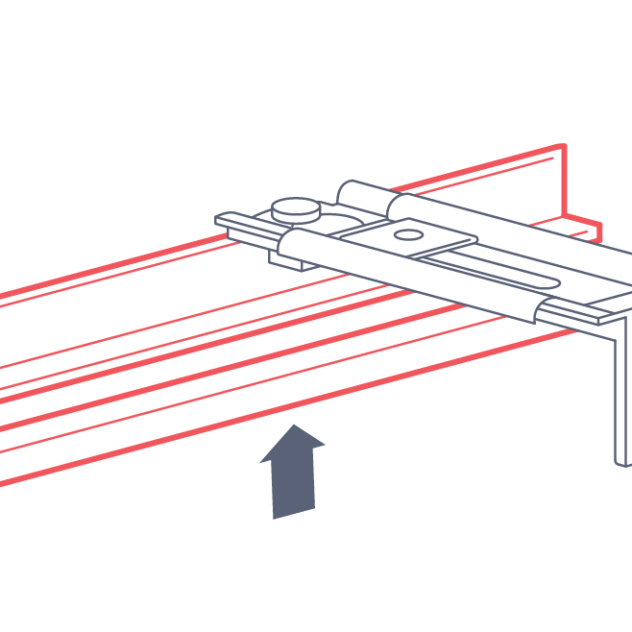
Step 2
If fitting a rod, raise the rod to meet the underside of the brackets.
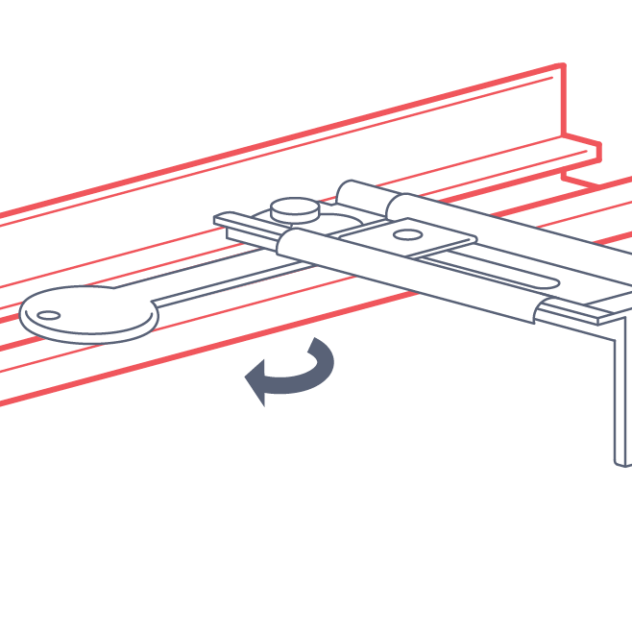
Step 3
Fix in place from above by turning the camlock a ¼ turn on each bracket.